

Brief
We where approached by a client looking for a traditional stained glass window incorporating a stags head to go in a country home. The window needed fitting in to a shaped stone mullion in a new extension that was built to house a meter room. The window was in a prominent location at the end of a large tree lined driveway.

Step 1
After a Site visit, a preliminary sketch is drawn up for approved.
Becky and our glazier Terry visit the property, we are glazing the finished panel so we need to check the dimensions and discuss how it will be fitted. Becky has a quick chat with the client, the design has already been discussed and budget agreed on beforehand.
On this occasion we where given the brief of a traditional style stags head. After a couple of sketched ideas and addition of some oak leaves the client approved Becky's design. Your welcome to make as many amendments to drawings as you like, we are more than happy to redraw and tweak the design until your totally satisfied.

Step 2
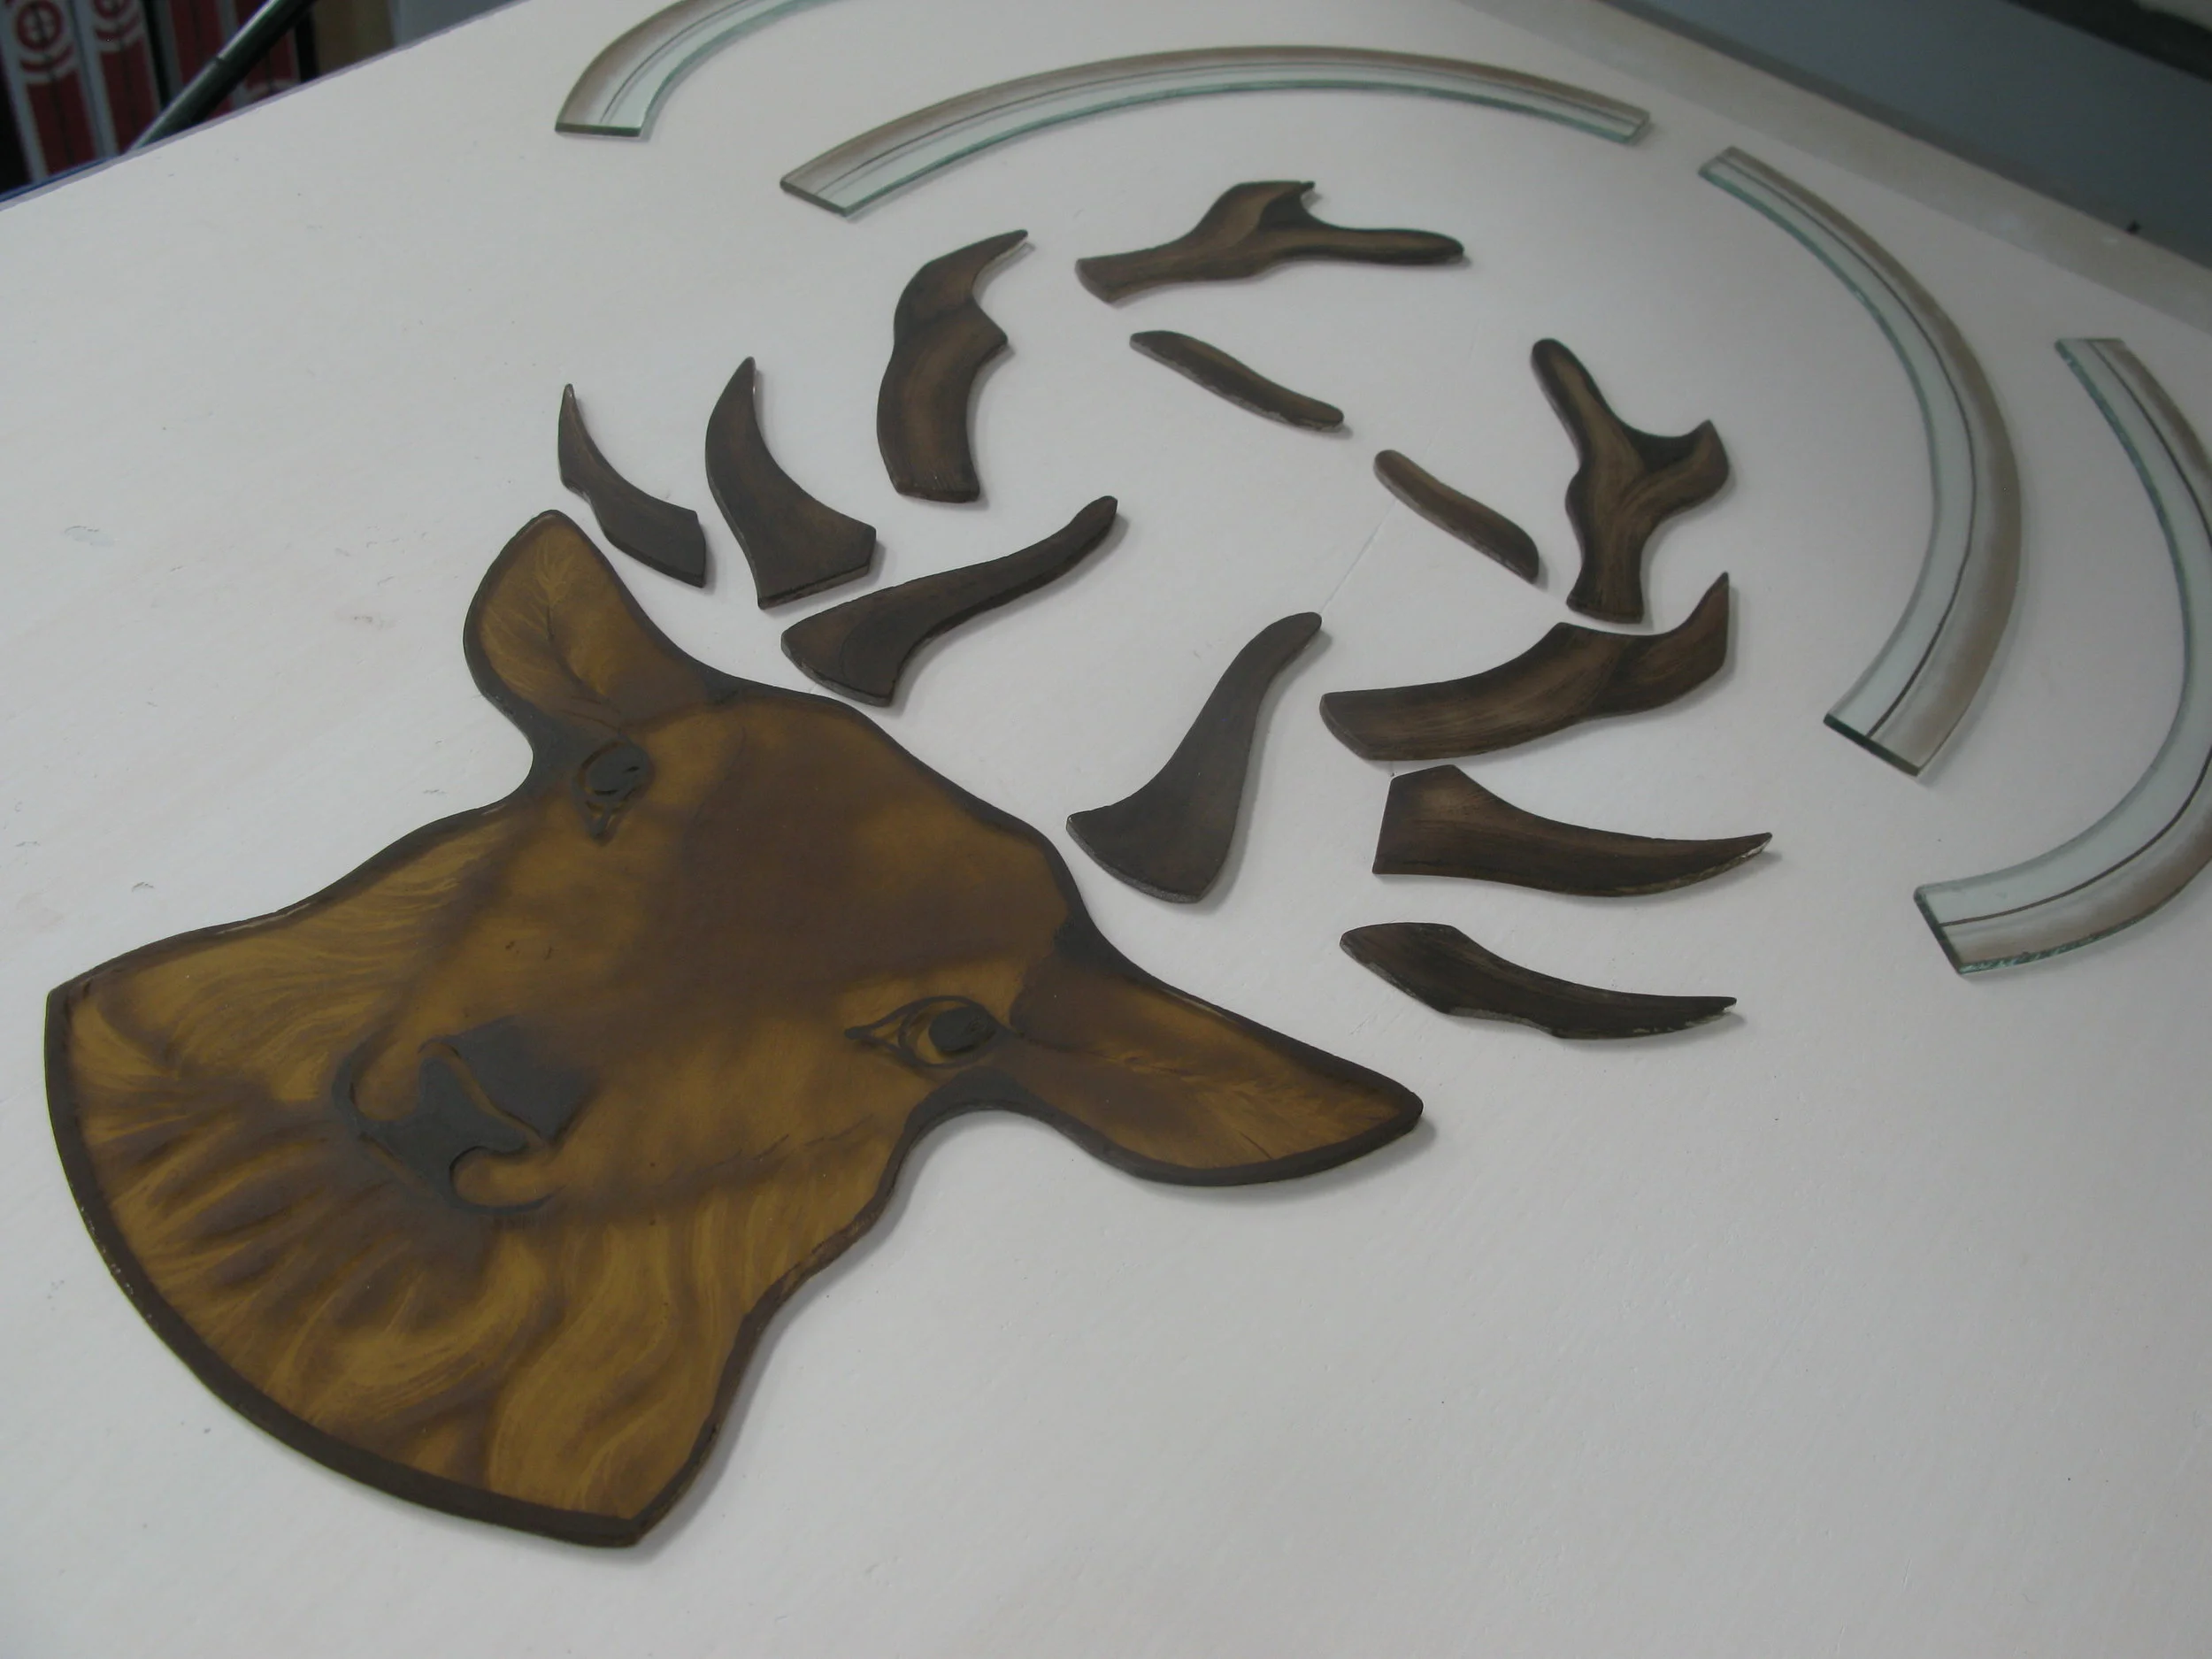
Colours are chosen and the glass is cut and sanded ready for painting.
The client called in to our workshop and chose from a selection of new and antique glass for the window. A full size layout is produced and Sam carefully cuts the individual sections to fit. Then the sections to be painted are sanded slightly to protect Becky fingers, and her paint brushes, from the sharp edges
Step 3
Hand painting of the stained glass sections.
The glass paint colour is chosen and is mixed. Sometimes we mix the paint with lavender or clove oil, sometimes just water and gum arabic. For the stags head, we are using ancient brown. The glass is thoroughly cleaned and little by little the layers of paint are built up on the glass, often having multiple firings in the kiln to get the depth of shading just right. Becky also uses small tools to scratch and stipple the paint and to add highlights. As the glass is fired it heats up to almost molten levels and the paint fuses into the surface of the glass. This ensures it will not come off and will hopefully last hundreds of years!

Step 4
Assembling the leaded light.
Once we are satisfied with the painted sections, Sam gets stuck in assembling the leaded light. He uses lengths of traditional lead came which he cuts and shapes carefully to each section. Once its all put together, the joints on both sides are soldered. To fill in the air spaces between the edge of the glass and the lead, a specialist lead light cement is forced in to all the gaps with a stiff brush, its messy business!

Step 5
Weatherproofing, cleaning and polishing
The lead cement is carefully brushed in to all the joints, then fine sawdust is rubbed in with a towel. This helps to dry the cement, clean it a bit and buff up the leads. Then we set it aside for a few days to dry out and strengthen, longer if the leaded light requires encapsulation. Then after a lot of cleaning and scrubbing the panel is sturdy, weatherproof and the leads have taken on a dark patina. After another clean, and vacuum (with our trusted Henry!) followed by a final inspection the stained glass panel is ready!

Step 6
Our expert glaziers fit the window.
Here is the stags head stained glass, happy in its new home. Everybody who walks up to the house will get to see and admire him. The clients are putting in LED lights behind so that he shows up at night too!
The methods we used to create this window are the same that have been used for hundreds of years. Technology only helps with some of the designing, and we can now email designs straight to you, and do this case study!